Building a DIY Standing Desk
I spend a lot of time in front of a computer, and thus, a lot of time at a desk. Because I generally don’t like sitting still, and because I recently learned that sitting all day can kill you, I decided to try to build a standing desk. I’m documenting here a design that I came up with that is inexpensive, easy to build, and has proven to be very practical.
I have neither a lot of carpentry experience, nor many carpentry tools, nor any workshop space, so I designed this desk to take advantage of preexisting products to the largest degree possible. The desk’s primary components are two of these ClosetMaid 9-sectional organizers:
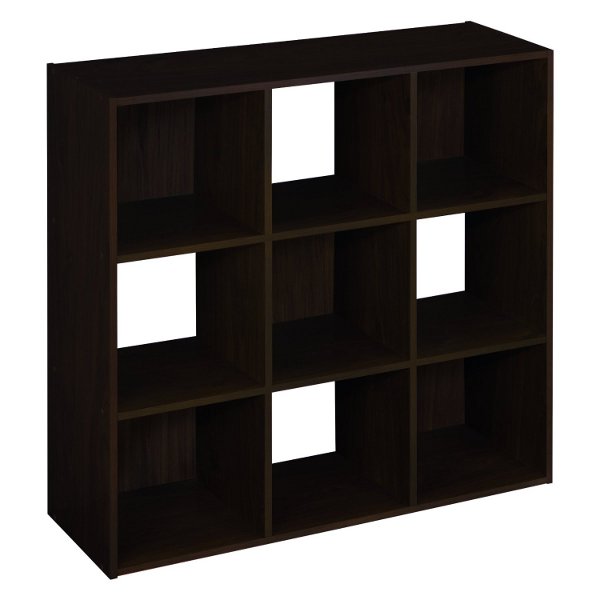
The above are stackable and reasonably sturdy, so they’re perfect for our purposes.
Beyond that, you’ll need two or four angle-irons of any sort.
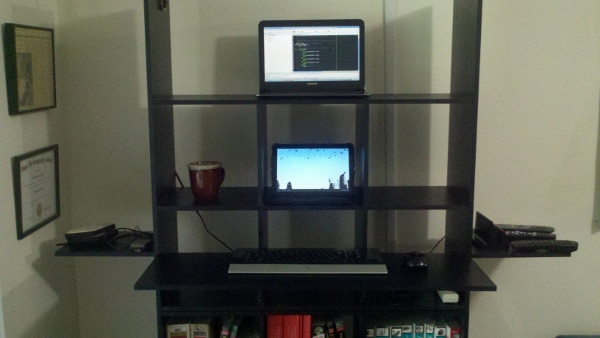
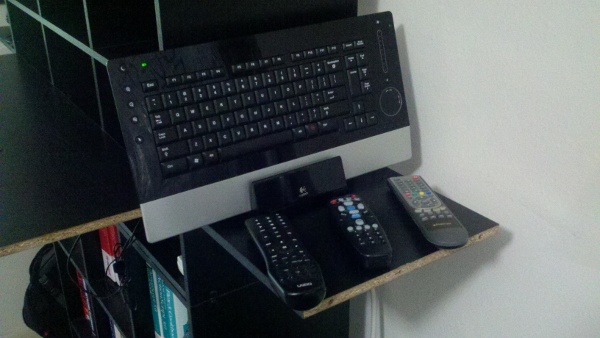
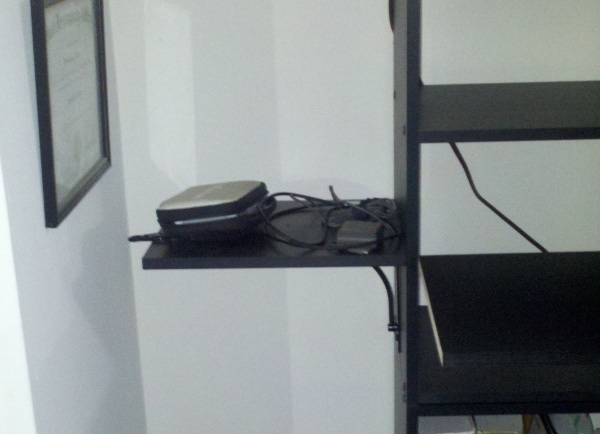
The Finished Product
Let’s take a look at the finished product first so you can see where we’re going: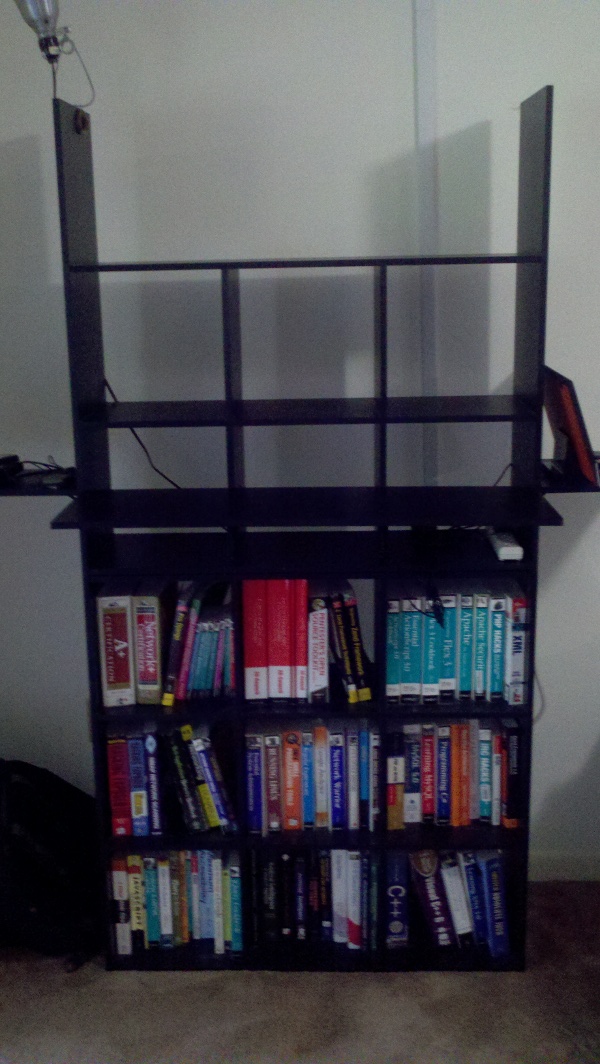

Keep those images in mind if you try to build this thing.
Build Instructions
The build steps for the desk are fairly straightforward:(I’m documenting this project after-the-fact, so please forgive me for not including more “in progress” build pictures. I wasn’t sure how this was going to turn out when I started, and I didn’t think ahead to document the build along the way.)
Assemble one of the nine-sectional organizers per the included instructions. Make sure not to cap its uppermost slots, because you’re going to be stacking another one on top of it. (This will make sense when you have the product in front of you.)
Assemble the second organizer per the instructions, but do not assemble the top row. Specifically, set aside the topmost long, horizontal board which should complete the shelf. Also set aside the two shorter “divider” boards which would compartmentalize that shelf into cubes.
Stack the two organizers, such that the modified organizer (step #2) sits atop the complete organizer from step 1. This completes the vertical backbone of the desk.
to attach a keyboard tray: fetch the leftover horizontal board set aside in step 2. This will form the keyboard tray. Attach this tray using to the front of the uppermost organizer using the angle irons, per the photographs:
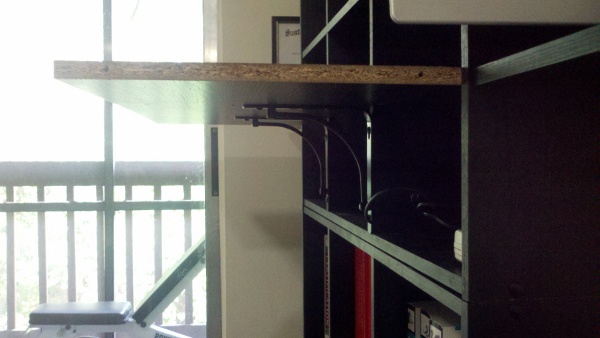

(Make sure to position the keyboard tray at the appropriate height for your body. I personally found it to be the most comfortable when it was mounted just an inch or two beneath my elbows when standing in a relaxed position in front of the desk.)
- 5. Optionally bracket the two remaining short "divider" boards to the sides
of the desk, per the photographs. (I use these for storage and charging
stations, and I find them pretty handy. Speakers or whatever could presumably
be mounted here as well.)
That’s it! Then you just need to situate your monitors, computers, tablets, etc. I find that the top shelf is just wide enough to accommodate my Samsung Series 9 side-by-side with a widescreen monitor (not shown). The cubbies are also extremely helpful for storing miscellaneous tech, coffees, etc. I find them to be pretty handy - one of the desk’s key “unplanned features”.