Building a DIY Acoustic Enclosure for the Shapeoko 3
Shortly after assembling my new Shapeoko 3, I realized that the milling process was quite loud, and would likely disturb my neighbors. (I live in a small apartment.) Wanting to avoid that, I decided to build a “soundproof” enclosure for the Shapeoko.
Here I’ll document my design for the enclosure, as well as some of the thought that went into it. I hope this effort benefits others who are looking to build something similar.
If you’re not interested in the design/build process, click here to skip to the end result.
The Design Process
Researching Existing Solutions
I assumed that others had already encountered and solved this problem, so I began by researching what they had done. Generally speaking, most of the designs I encountered seemed to be variations on this theme:Build a five-sided box (ie, a cube without a front face) out of a heavy material
Complete the box with a transparent front face - typically made out of acrylic
Optionally line the cube’s interior with sound-deadening material like acoustic foam
Many of the enclosures seemed sensible, but I was uncertain how effective they were at deadening sound. It seemed as though many people were building enclosures simply for the sake of dust-containment, whereas my primary goal was sound-isolation. Thus, I decided to take a slightly different approach.
Planning
My primary fear with the designs I researched was that the thin, acrylic front panel would “leak” too much sound. To minimize sound leakage as much as possible, I wanted to build the entire enclosure out of a heavy material - including the front panel.The obvious drawback to that approach, of course, is that it would prevent me from being able to see inside the enclosure.
To mitigate that problem, I decided to shamelessly steal the solution implemented by the Glowforge: embed a webcam (and lighting) inside the enclosure.
With a general plan in mind, I was nearly ready to begin modelling the enclosure in Sketchup - my preferred CAD program for simple projects like this. (It’s really easy to use.) Before I began, though, I wanted to educate myself more on the topic of sound-isolation, which I knew little about.
Sound-isolation is a complicated subject, but from my research, I gathered a few key points:
The enclosure must be “airtight”.
The thicker and heavier its walls, the better.
The more compact it was, the better. (Cavernous spaces resonate more.)
Lining the enclosure’s interior with acoustic foam would help to mute high-frequency noise.
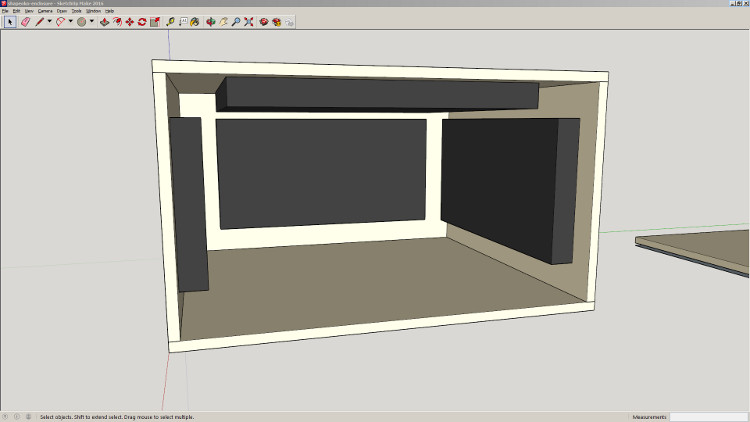
With those design criteria in mind, I modelled the enclosure in Sketchup:
I also laid out a cut pattern for the panels:
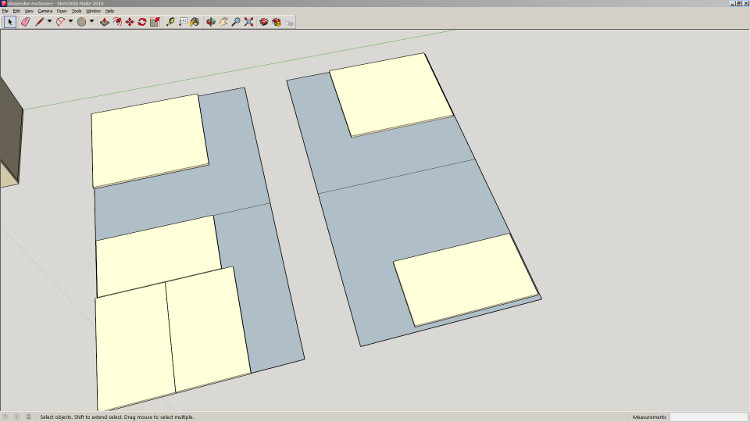
The Sketchup file is available for download here. Note that I did not bother to model every detail, like where the feet, hinges, and latches were to be installed. Those details are relatively unimportant, though, and can easily be inferred from the upcoming photographs.
With a Sketchup model worked out, I was ready to begin the physical build.
The Build Process
I chose to build the box entirely out of 3/4" MDF, because:I’ve worked with it in the past and understand its properties
It’s a good source of “cheap mass”, making it suited for soundproofing
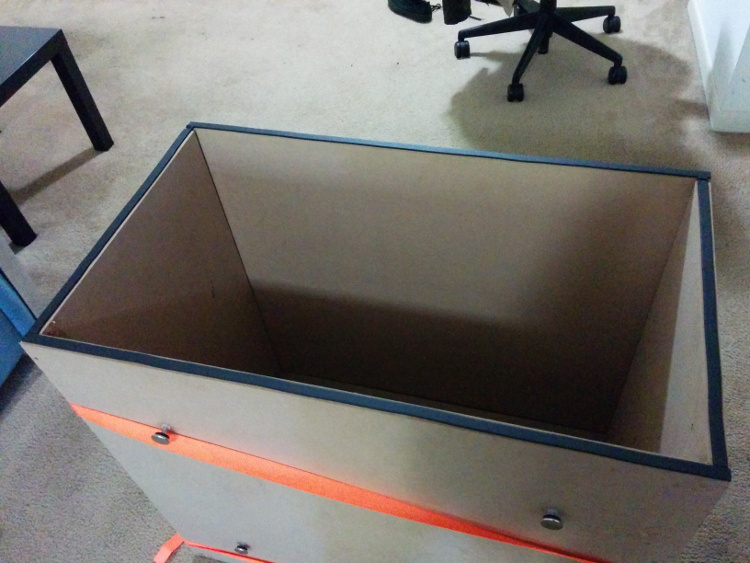
I started by cutting the MDF panels to size per the Sketchup model, and then assembled four sides of a cube:

I glued the panels together using Elmer’s wood glue. I’m generally not a fan of glues because they make “disassembly” into a destructive process, but in this case, I used glue because it was the easiest solution. Had I more workspace, more patience, and larger clamps, I would otherwise have preferred to use screws.
After the glue dried, I caulked the glued seams inside and out in order to help make the box “airtight”. (I put “airtight” in quotes because, of course, the box is not literally airtight.)
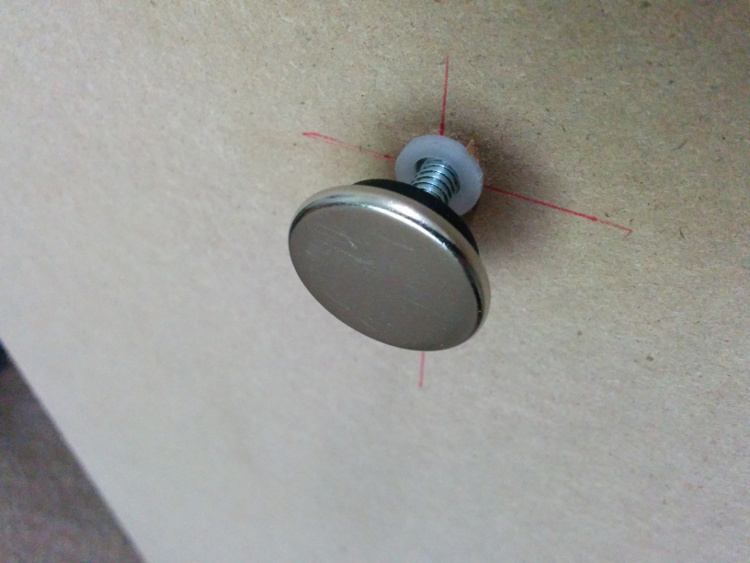
Once the caulk dried, I installed some threaded leveling-guides near each corner of the enclosure’s bottom face:
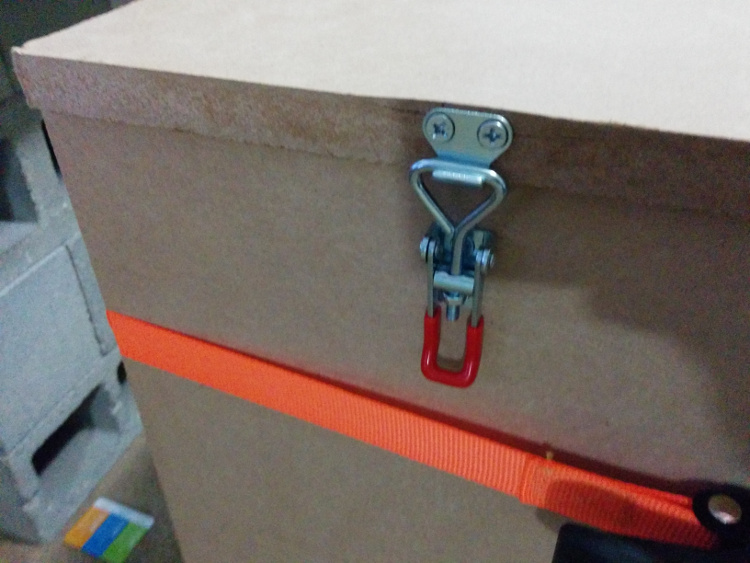
With the leveling-guides in place, I then applied speaker-box gasket-tape to the panel edges. This would help to keep the enclosure airtight when assembled:
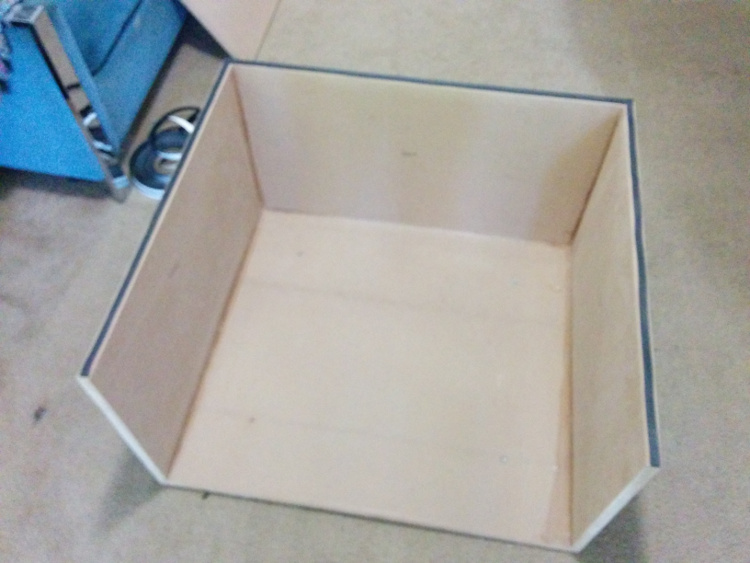
(Ignore the orange straps in these photos - they aren’t a permanent part of the design. I just used them to apply clamping pressure while the glue and caulk initially dried.)
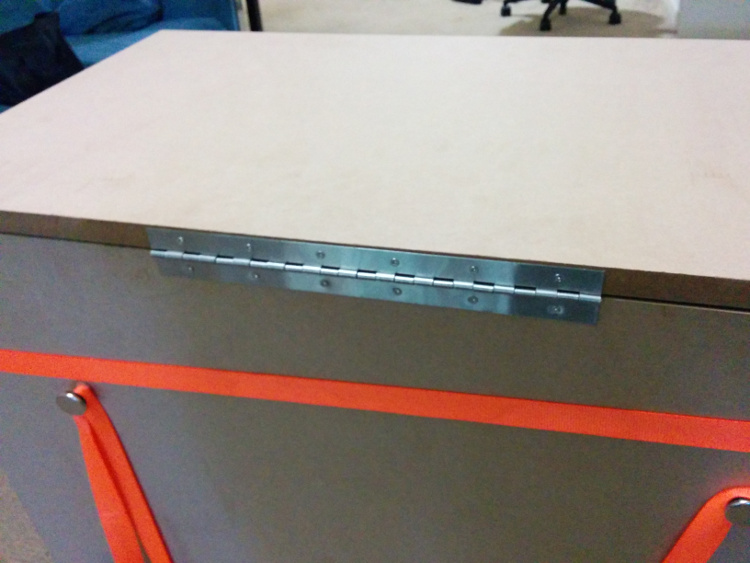
With the gaskets in place, I then attached the front panel to the enclosure using a continuous hinge:
Then I installed a pair of latches that would allow the front panel to be sealed tightly against the gaskets:
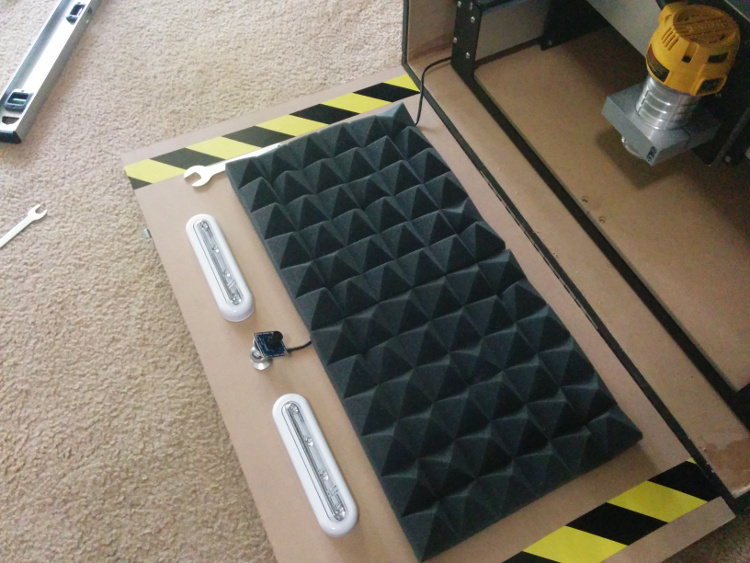
I then used a heavy-duty stapler to attach acoustic foam tiles to the enclosure’s interior walls:
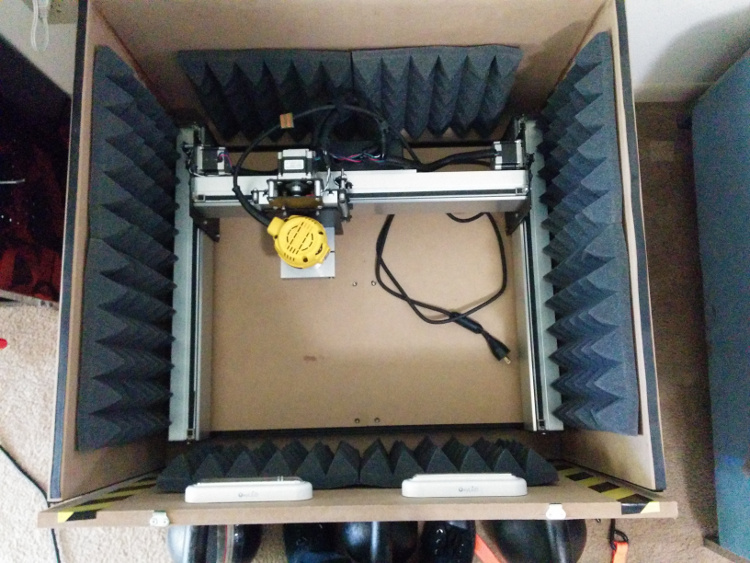

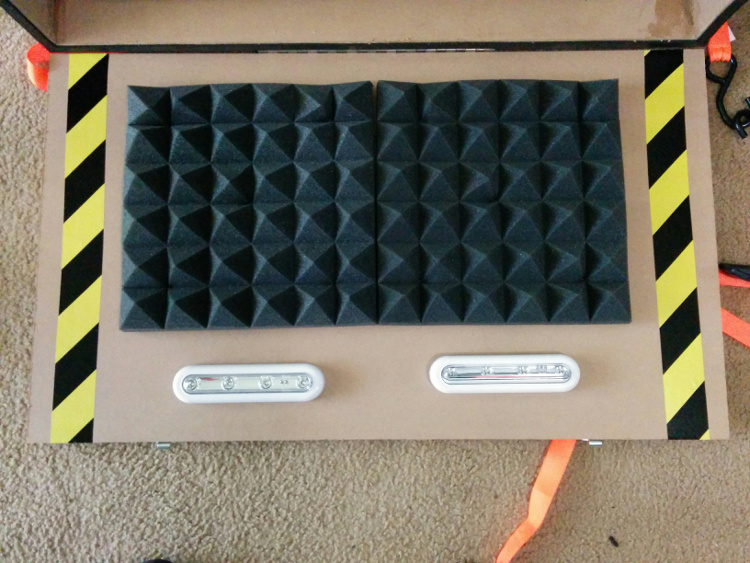
I then mounted a pair of battery-powered LED light-strips to the inside surface of the front panel. The LEDs could be rotated in their housing, so I rotated them downward toward the spoilboard:
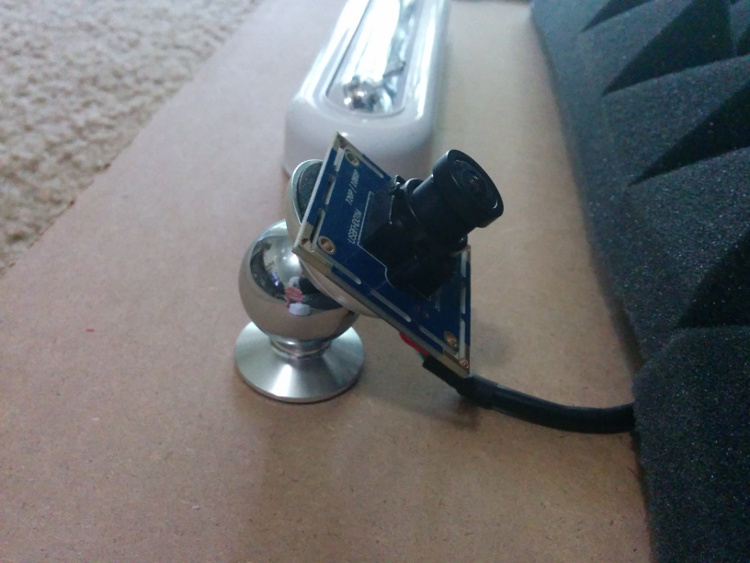
I then used a magnetic mount to mount a small webcam between the light-strips, and likewise aimed it down at the spoilboard:
This shows the completed interior surface of the front panel:
I then placed the entire enclosure atop four short cinder blocks, and leveled it using the leveling-guides. (Of course, it would have been better to seat this on a slab, but I live in a second-story apartment.)
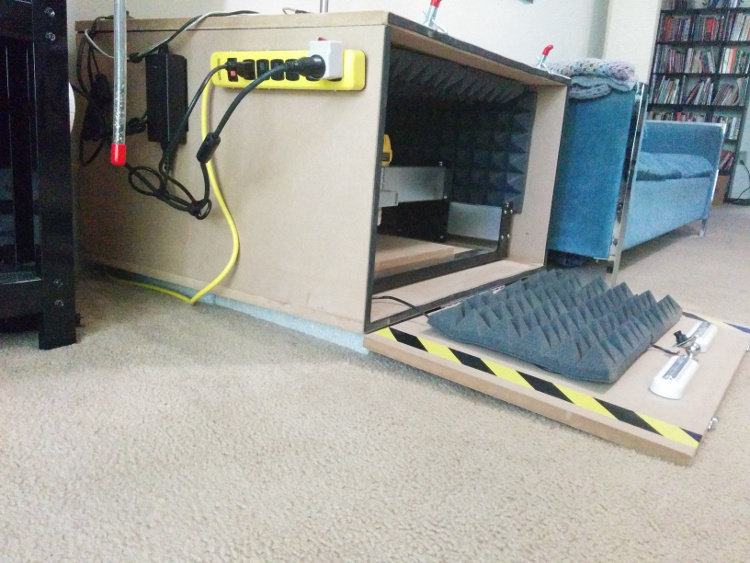
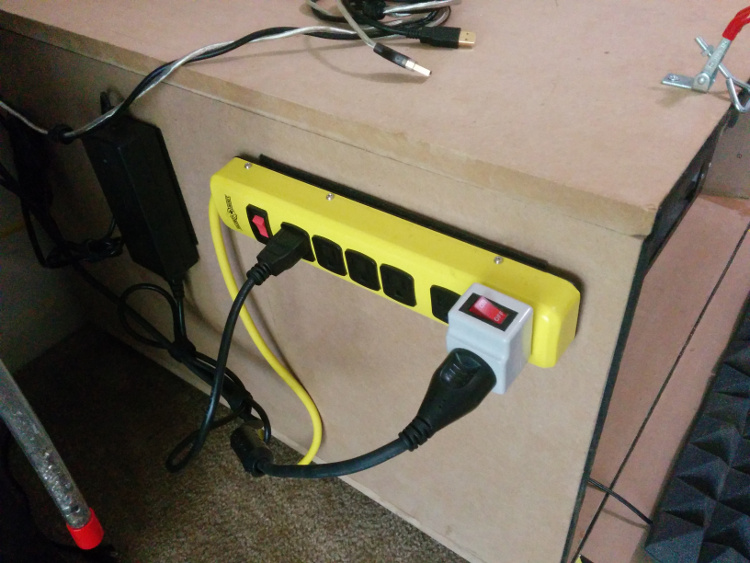
Lastly, I rigged up a some electrical controls on the enclosure’s exterior. The power-strip provides me with an “emergency” switch that I can use to cut power to everything if something goes wrong. The individual switch (that juts out of the power-strip) powers the router, allowing me to turn it on and off while the enclosure is closed. (I consider this a safety feature.)
The End Result
This is the end result: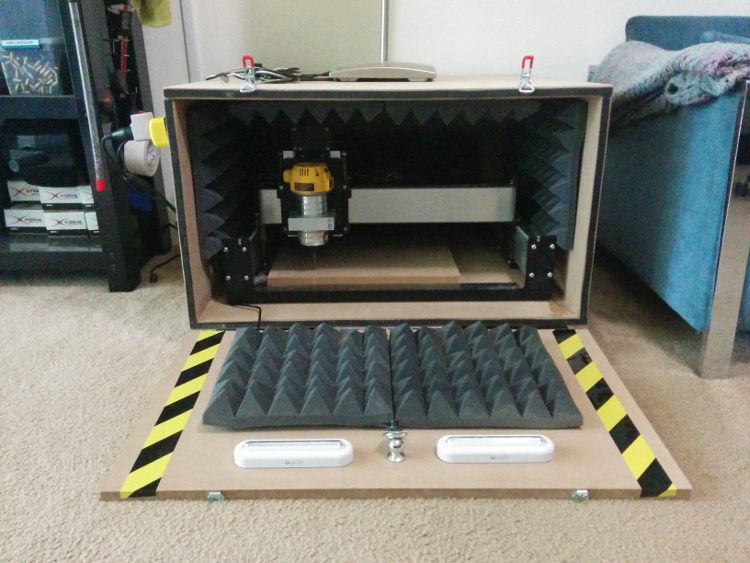
Here’s an example of the view provided by the webcam while milling. I’m very happy with it:
(I used cheese to capture the video.)
Final Thoughts
The enclosure, so far, appears to have been very successful. It dramatically lessens the noise emitted while milling.My one regret regarding this project is that I did not quantify the before/after sound emitted in decibels. Subjectively, however, I’ll say that it cuts the noise down from “very loud” to “barely audible”. Again, subjectively, the noise emitted by the enclosure while cutting is now perhaps only twice as loud as a typical PC fan.
So, I happily consider this project a success. I don’t have comments on this blog, but if you’d like to comment or ask me a question, feel free to tweet to me at @chrisallenlane.
Appendix - Bill of Materials
I used the following materials and items in the build. You may use this as a reference if you’re planning on building something similar. (Full-disclosure: these are affiliate links.)- 3/4" MDF
- acoustic foam (1 pack)
- gasket tape (1 roll)
- hazard tape (3 pack, though needed far less)
- latches (2)
- leveling-guides (1 pack)
- light-strips (2)
- power-strip (1)
- power-strip switch (1)
- webcam (1)
- webcam mount (1)